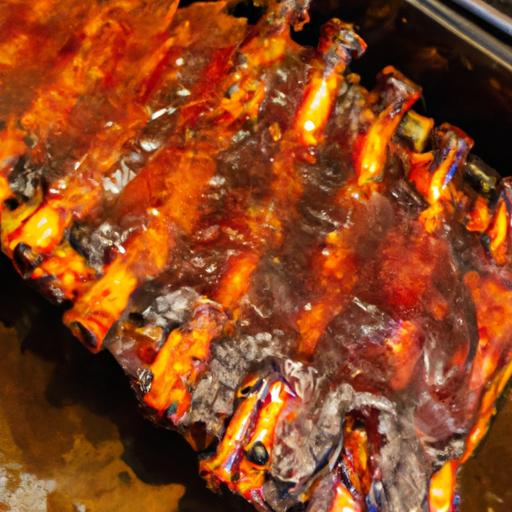
Are you ready to indulge in melt-in-your-mouth ribs that are bursting with flavor? Look no further! In this article, I’ll introduce you to the art of slow cooking ribs in the oven at a low, steady temperature of 325 degrees Fahrenheit. Trust me, this cooking method is a game-changer when it comes to achieving succulent and mouthwatering ribs.
The concept of slow cooking ribs in the oven at 325 degrees Fahrenheit is all about patience and precision. By cooking the ribs at a lower temperature for an extended period, you allow the connective tissues in the meat to break down slowly, resulting in tender, juicy ribs that practically fall off the bone. This method is perfect for those who appreciate the art of slow cooking and savoring the flavors that develop over time.
Now, let’s talk about the advantages of slow cooking ribs in the oven at 325 degrees. First and foremost, the low and slow approach ensures that the meat retains its moisture, preventing it from drying out. This means you’ll never have to worry about tough or chewy ribs again. Instead, you’ll be greeted with ribs that are incredibly tender, juicy, and packed with flavor.
Furthermore, slow cooking allows the flavors of your chosen seasonings to penetrate deep into the meat, resulting in a truly mouthwatering experience. Whether you prefer a smoky dry rub or a tangy marinade, the slow cooking process ensures that every bite is infused with the delicious flavors you crave.
So, if you’re ready to take your rib game to the next level, join me as we dive into the world of slow cooking ribs in the oven at 325 degrees. Get your taste buds ready for a tantalizing experience that will leave you craving more. Stay tuned for the next section where we’ll explore the different ways to prepare your ribs for this delectable cooking adventure.*
Preparing the Ribs
Selecting the Perfect Ribs for Oven Cooking
When it comes to slow cooking ribs in the oven at 325 degrees, selecting the right type of ribs is crucial for achieving the best results. Baby back ribs and spare ribs are two popular options that work wonders in the oven. Baby back ribs, also known as loin back ribs, are smaller and more tender, making them a favorite among many rib enthusiasts. Spare ribs, on the other hand, are larger and meatier, perfect for those who enjoy a hearty and robust rib experience. Whichever you choose, rest assured that both types can be transformed into succulent masterpieces through slow cooking.
Preparing the Ribs for Flavorful Seasoning
Before we dive into the seasoning process, it’s important to prepare the ribs properly to ensure optimal texture and taste. Start by cleaning the ribs under running water to remove any bone fragments or unwanted debris. Pat them dry with a paper towel to create a clean surface for the seasonings to adhere to.
Next, it’s time to trim the ribs. While some fat adds flavor, excess fat can prevent seasonings from penetrating the meat effectively. Using a sharp knife, gently trim away any thick or excessive fat layers. Be careful not to remove too much, as some fat is necessary for a moist and flavorful outcome.
Once your ribs are cleaned and trimmed, they are now ready to be seasoned to perfection. Whether you prefer a dry rub or a marinade, the key is to apply the seasonings generously, ensuring that every inch of the ribs is coated. This will elevate the flavors and infuse the meat with deliciousness.
Now that you know how to select the ideal ribs and prepare them for seasoning, we can move on to the exciting part – exploring the myriad of seasoning options that will take your slow-cooked ribs to new heights. Stay tuned for the next section, where we’ll uncover some mouthwatering seasoning ideas that will have you counting down the minutes until your next rib feast.
Seasoning the Ribs
Enhancing Flavor with Seasonings
When it comes to seasoning your ribs, the possibilities are endless! Let’s dive into the world of flavors and explore various options that can elevate the taste of your slow-cooked ribs.
Dry Rubs: One popular way to season ribs is by using a dry rub. These flavorful mixtures consist of a combination of spices, herbs, and seasonings that are generously rubbed onto the surface of the meat. The dry rub forms a delicious crust during the cooking process, adding depth and complexity to your ribs. Experiment with different combinations of ingredients like paprika, brown sugar, garlic powder, cayenne pepper, and cumin to create a rub that suits your taste buds. Don’t be afraid to get creative and tailor it to your preferences.
Marinades: Another fantastic option to infuse your ribs with flavor is by marinating them. Marinades typically consist of a liquid base, such as vinegar, soy sauce, or citrus juice, combined with an array of herbs, spices, and aromatics. The ribs soak in the marinade for several hours, allowing the flavors to penetrate the meat and tenderize it. You can experiment with ingredients like Worcestershire sauce, honey, garlic, ginger, and even pineapple juice to create a tantalizing marinade that suits your taste.
Popular Seasoning Recipes and Recommendations
Looking for some tried-and-true seasoning recipes or recommendations? Here are a couple of ideas to get you started on your flavor-packed journey:
1. Classic Dry Rub: In a bowl, combine 2 tablespoons of brown sugar, 1 tablespoon of paprika, 1 teaspoon of garlic powder, 1 teaspoon of onion powder, 1 teaspoon of salt, 1/2 teaspoon of black pepper, 1/2 teaspoon of chili powder, and a pinch of cayenne pepper. Mix well and generously rub this flavorful blend onto your ribs before slow cooking them. The result? Ribs with a perfect balance of sweet, smoky, and slightly spicy flavors.
2. Tangy BBQ Marinade: In a bowl, whisk together 1/4 cup of ketchup, 2 tablespoons of Worcestershire sauce, 2 tablespoons of apple cider vinegar, 1 tablespoon of honey, 1 tablespoon of soy sauce, 1 teaspoon of Dijon mustard, 1 teaspoon of garlic powder, and a pinch of salt and pepper. Pour this zesty marinade over your ribs, cover, and refrigerate for at least 4 hours (or overnight) before slow cooking. Prepare yourself for a burst of tangy, savory goodness.
Remember, these are just a couple of ideas to get you started. Feel free to explore different flavor profiles, experiment with your favorite ingredients, and let your creativity shine. Stay tuned for the next section where we’ll delve into the cooking process itself, ensuring your ribs come out perfectly tender and flavorful.
Cooking Process
Preheating the Oven and Arranging the Ribs
Now that we have our ribs prepped and seasoned to perfection, it’s time to dive into the cooking process. Let’s get those ovens preheated and ready to work their magic!
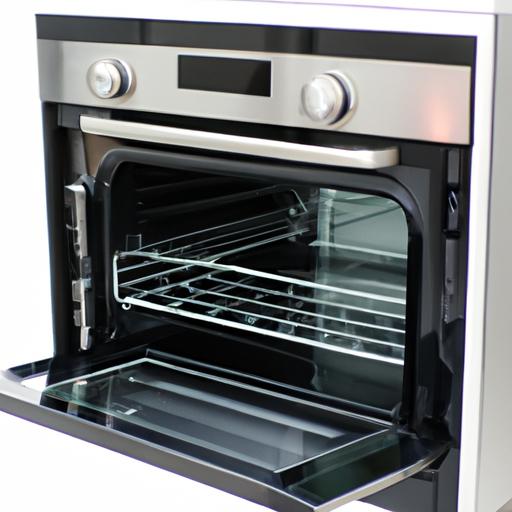
To start, preheat your oven to a steady temperature of 325 degrees Fahrenheit. This temperature is ideal for slow cooking the ribs, allowing them to gently cook and develop those delicious flavors we’re after. Give the oven some time to reach the desired temperature, ensuring an even cooking process.
While the oven is preheating, it’s time to arrange your ribs on a baking tray. Make sure to choose a tray large enough to accommodate the ribs without overcrowding them. This allows for proper air circulation and ensures that the heat is evenly distributed, resulting in perfectly cooked ribs.
Trapping Moisture for Tender Ribs
To keep those ribs moist and succulent throughout the cooking process, it’s crucial to trap the moisture. Let’s explore some effective methods to achieve this.
One popular technique is to cover the baking tray with aluminum foil. This creates a sealed environment, trapping the moisture released from the ribs and ensuring they stay tender and juicy. Alternatively, you can use a baking bag, which serves the same purpose of locking in the moisture while providing a convenient and mess-free option.
Cooking Time Based on Weight and Type of Ribs
Time to pop those ribs into the oven and let them work their magic! But how long should you cook them? Let’s find out.
The recommended cooking time will vary depending on the weight and type of ribs you’re working with. Generally, baby back ribs require less time compared to spare ribs due to their smaller size. As a rule of thumb, allocate around 2.5 to 3 hours of cooking time for baby back ribs and 3 to 3.5 hours for spare ribs. However, keep in mind that these are estimates, and it’s always best to rely on the internal temperature for doneness.
To ensure your ribs are cooked to perfection, set a timer and monitor the cooking process closely. Remember, slow cooking is all about patience, so resist the temptation to open the oven frequently. Each time you do, valuable heat and moisture escape, potentially affecting the final result.
In the next section, we’ll discover the importance of basting the ribs during the cooking process and how it adds that extra layer of flavor and juiciness. Get ready to elevate your ribs to new heights!
Basting and Temperature Checks
Basting: The Secret to Moist and Flavorful Ribs
When it comes to slow cooking ribs in the oven at 325 degrees, basting is a crucial step that ensures your ribs remain moist, tender, and bursting with flavor. But why is basting so important? Let me break it down for you.
During the cooking process, basting involves periodically brushing or spooning the ribs with flavorful liquids. This helps to keep the meat moist by preventing it from drying out. As the ribs slowly cook, the basting sauce seeps into the meat, infusing it with additional layers of flavor and enhancing its juiciness. It’s like giving your ribs a delicious spa treatment, ensuring they stay succulent and mouthwatering.
Now, let’s explore some basting techniques and a simple homemade basting sauce recipe to elevate your ribs to the next level.
Basting Techniques to Amp Up Flavor
-
Brushing Method: Using a silicone basting brush, gently brush the ribs with your chosen basting sauce every 30 minutes throughout the cooking process. This technique ensures an even distribution of flavors and helps to build up a beautiful glaze on the ribs.
-
Spoon Basting: For a more hands-on approach, use a spoon to scoop up the basting sauce and drizzle it over the ribs. This technique allows you to control the amount of sauce applied and gives you the opportunity to baste any areas that need a little extra love.
Simple Homemade Basting Sauce Recipe
To get you started, here’s a quick and easy homemade basting sauce recipe that will take your ribs to new heights of deliciousness.
Ingredients:
- 1 cup ketchup
- 1/4 cup apple cider vinegar
- 2 tablespoons brown sugar
- 1 tablespoon Worcestershire sauce
- 1 teaspoon garlic powder
- 1 teaspoon onion powder
- 1/2 teaspoon smoked paprika
- Salt and black pepper to taste
Instructions:
- In a bowl, whisk together all the ingredients until well combined.
- Taste and adjust the seasoning according to your preference.
- Use this homemade basting sauce to brush or spoon over your ribs during the cooking process, ensuring they stay moist and flavorful.
The Significance of Temperature Checks
While basting keeps your ribs moist and flavorful, ensuring they are cooked to perfection requires one additional step: temperature checks. Let me explain why.
Using a meat thermometer to check the internal temperature of your ribs is crucial to determine their doneness. Relying solely on cooking time can lead to overcooked or undercooked ribs, resulting in a less than ideal eating experience. By monitoring the temperature, you can ensure your ribs are cooked to the desired level of doneness, guaranteeing juicy and perfectly cooked meat.
For tender ribs, aim for an internal temperature between 195-203 degrees Fahrenheit. Insert the meat thermometer into the thickest part of the meat, away from the bone. Once the desired temperature is reached, you can confidently remove the ribs from the oven, knowing they are ready to be devoured.
So, remember to baste your ribs to keep them moist and full of flavor, and don’t forget to use a meat thermometer for temperature checks to achieve that perfect level of tenderness. In the next section, we’ll explore some finishing touches and serving suggestions to complete your slow-cooked rib masterpiece. Stay tuned!
Conclusion: Fall-Off-The-Bone Ribs Made Easy
Congratulations! You’re now equipped with the knowledge and techniques to create the most tender and flavorful ribs right in your own oven. Slow cooking ribs at 325 degrees Fahrenheit is an art that guarantees incredible results.
Through the slow cooking process, you unlock a world of succulent and juicy ribs that will leave your family and friends impressed. The low temperature allows the ribs to cook slowly and evenly, ensuring that every bite is packed with tender, melt-in-your-mouth goodness. Say goodbye to tough and dry ribs forever!
But it doesn’t stop there. Slow cooking also intensifies the flavors and allows the seasonings to penetrate the meat, creating a symphony of taste in every bite. Whether you opt for a classic dry rub or experiment with a tantalizing marinade, your taste buds are in for a treat. The slow cooking method truly elevates the flavor profile of your ribs to new heights.
Remember to baste your ribs throughout the cooking process, keeping them moist and adding an extra layer of flavor. And don’t forget to use a meat thermometer to ensure your ribs reach the perfect internal temperature for ultimate tenderness and safety.
Now it’s time to gather your ingredients, preheat that oven to 325 degrees Fahrenheit, and embark on a rib-cooking adventure. Whether you’re hosting a backyard barbecue or simply craving a delectable meal, slow cooking ribs in the oven will never disappoint.
So, get ready to impress your loved ones with fall-off-the-bone ribs that will have them coming back for seconds. Embrace the joy of slow cooking and savor every delicious moment. Happy cooking!
Thank you for joining me on this culinary journey. Stay tuned for more mouthwatering recipes and cooking tips. Until next time, enjoy your perfectly cooked ribs and the smiles they bring to your table.